Reese’s Peanut Butter Cup Cheesecake

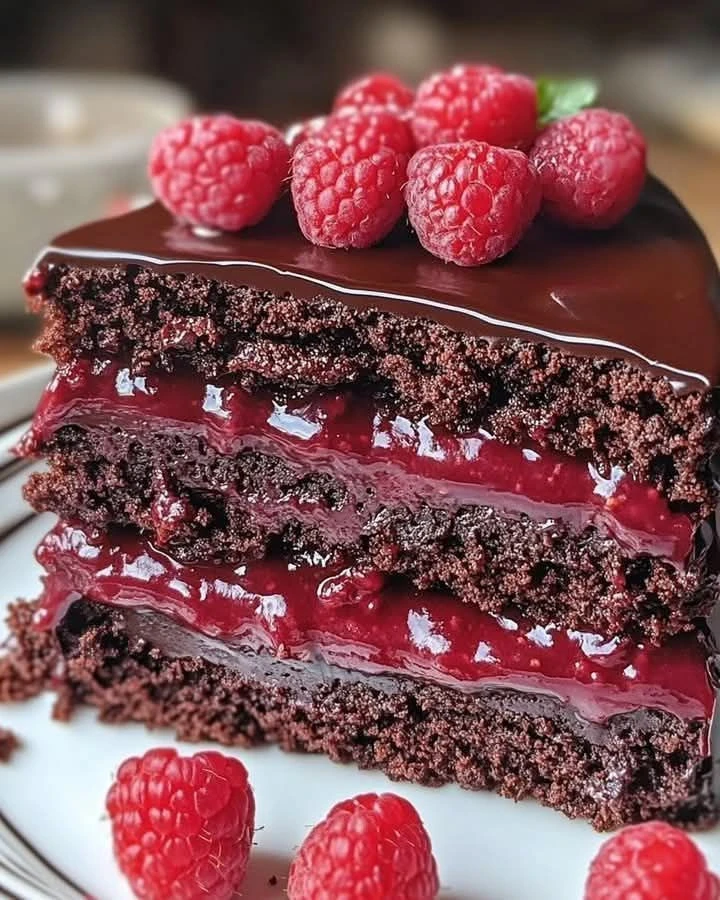
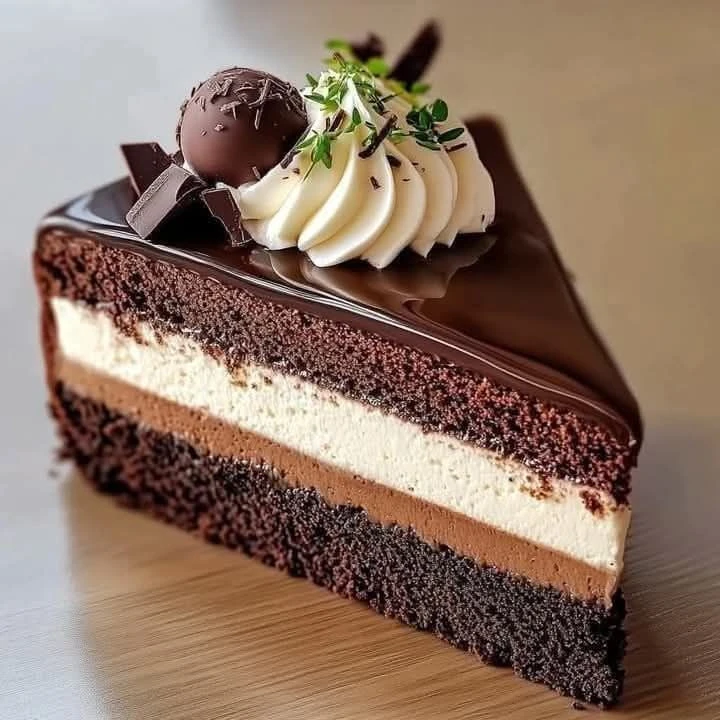
If you love peanut butter and chocolate, then you’re in for a treat! The Reese’s Peanut Butter Cup Cheesecake is a delicious dessert that combines creamy cheesecake with the rich flavors of peanut butter and chocolate. It’s perfect for any occasion, whether it’s a family gathering or a cozy night at home.

Why Make This Recipe

This cheesecake is a crowd-pleaser! It brings smiles to faces and is sure to impress anyone who tries it. Plus, it’s easy to make! If you have a sweet tooth or you want to surprise your loved ones, this recipe is a must-try. You don’t need to be a pro baker to whip up this delightful dessert.

How to Make Reese’s Peanut Butter Cup Cheesecake

Ingredients:

  • 1 1/2 cups chocolate cookie crumbs
  • 1/4 cup melted butter
  • 3 packages (8 oz) cream cheese, softened
  • 1 cup sugar
  • 1 cup sour cream
  • 1 teaspoon vanilla extract
  • 3 large eggs
  • 1 cup creamy peanut butter
  • 15-20 Reese’s peanut butter cups, chopped
  • 1 cup heavy cream
  • 1/2 cup chocolate chips
  • 1/2 cup peanut butter chips
  • Caramel sauce for drizzling
  • Whipped cream for topping

Directions:

  1. Preheat your oven to 325°F (163°C).
  2. In a bowl, mix the chocolate cookie crumbs and melted butter together. Press this mixture into the bottom of a 9-inch springform pan to create the crust.
  3. In a large bowl, beat the softened cream cheese and sugar until smooth.
  4. Add the sour cream and vanilla extract, mixing well.
  5. Add the eggs one at a time, beating after each one until well combined.
  6. Stir in the creamy peanut butter until the mixture is smooth.
  7. Fold in half of the chopped Reese’s.
  8. Pour the cheesecake mixture over the prepared crust and smooth the top.
  9. Bake for 55-60 minutes, until the center is firm and the edges are lightly golden.
  10. Turn off the oven and let the cheesecake cool inside with the door slightly open for 1 hour.
  11. After that, remove it from the oven and let it cool completely at room temperature.
  12. Once cooled, refrigerate for at least 4 hours or overnight.
  13. In a small saucepan, heat the heavy cream over medium heat until it starts to boil.
  14. Remove from heat and add the chocolate chips, stirring until they melt and make a silky ganache.
  15. Let it cool slightly, then drizzle over the chilled cheesecake.
  16. Top with the remaining chopped Reese’s, peanut butter chips, and drizzle caramel sauce over the top.
  17. Add whipped cream dollops for extra fun!

How to Serve Reese’s Peanut Butter Cup Cheesecake

Slice the cheesecake into wedges and serve it chilled. This dessert goes great with a drizzle of chocolate ganache and a dollop of whipped cream. You can also add some extra chopped Reese’s on top for decoration.

How to Store Reese’s Peanut Butter Cup Cheesecake

Keep any leftover cheesecake in the refrigerator. Cover it well with plastic wrap or place it in an airtight container. It should stay fresh for up to a week. You can also freeze it for longer storage—just wrap it tightly and it will last for up to 2 months.

Tips to Make Reese’s Peanut Butter Cup Cheesecake

  • Make sure your cream cheese is softened to room temperature for a smooth filling.
  • Don’t skip the chilling time! This cheesecake tastes even better after a night in the fridge.
  • If you want a stronger peanut butter flavor, feel free to add more peanut butter to the filling.

Variation

You can get creative with this recipe! Try swapping the chocolate cookie crust for a graham cracker crust or adding different toppings like crushed Oreos or chopped nuts.

FAQs

1. Can I use crunchy peanut butter instead of creamy?
Yes! Crunchy peanut butter will add a nice texture to your cheesecake.

2. How long does it take to make this cheesecake?
It takes about 20 minutes to prep and then it bakes for an hour. Don’t forget to chill it before serving!

3. Can I make this cheesecake without eggs?
Yes! You can replace eggs with a mixture of banana or applesauce for a vegan option, though the texture may vary a bit.

Now you’re ready to try your hand at this Reese’s Peanut Butter Cup Cheesecake! Enjoy the process and indulge in the delicious results.

Sweet Pink Non-Alcoholic Cocktail

Sweet Pink Non-Alcoholic Cocktail


Introduction

Looking for a fun and tasty drink that everyone can enjoy? The Sweet Pink Non-Alcoholic Cocktail is just the thing! It’s creamy, colorful, and perfect for any occasion. Whether it’s a party or a family dinner, this drink will bring smiles all around.

Why Make This Recipe

This cocktail is not only delicious but also super easy to make! You can whip it up in no time, and it’s a hit with kids and adults alike. It’s perfect for birthdays, holidays, or just a cozy night at home. Plus, you can customize it with your favorite toppings.

How to Make Sweet Pink Non-Alcoholic Cocktail

Ingredients:

  • 1 1/2 oz vanilla syrup
  • 1 oz strawberry syrup
  • 1 oz white chocolate syrup
  • 1 oz heavy cream or half-and-half
  • 1/2 oz grenadine
  • Ice cubes
  • Whipped cream (for garnish)
  • Pink sugar (for the rim)
  • Heart-shaped sprinkles

Directions:

  1. Sweeten the rim: Dip the edge of a glass in grenadine, then coat it with pink sugar for a fun twist.
  2. Mix it up: In a shaker filled with ice, combine the vanilla syrup, strawberry syrup, white chocolate syrup, cream, and grenadine. Shake well until it’s smooth and cold.
  3. Pour and decorate: Strain the mixture into your prepared glass. Top it with a swirl of whipped cream, sprinkle on some heart-shaped sprinkles, and add a splash of grenadine.
  4. Sip and enjoy: Take a moment to enjoy this creamy, sweet delight!

How to Serve Sweet Pink Non-Alcoholic Cocktail

Serve this cocktail in a fun glass, maybe with a colorful straw. It’s great for parties or cozy family dinners. Don’t forget to add the cute decorations on top to make it extra special!

How to Store Sweet Pink Non-Alcoholic Cocktail

This drink is best enjoyed fresh. However, if you have any leftover mixture, store it in the fridge in a sealed container for up to a day. Just give it a good shake before serving again!

Tips to Make Sweet Pink Non-Alcoholic Cocktail

  • Use chilled ingredients for a better taste and a refreshing drink.
  • Customize the sweetness by adjusting the amount of syrups based on your preference.
  • Try adding other toppings like chocolate shavings or edible glitter for extra fun!

Variation

Feel free to mix in different flavors! You can swap the syrups for any of your favorites, like mango or raspberry, to create your unique version of this cocktail.

FAQs

Can I make this ahead of time?
No, it’s best to enjoy it fresh for the best flavor and texture.

Is this suitable for kids?
Absolutely! This cocktail is non-alcoholic and perfect for kids.

Can I use regular sugar instead of pink sugar?
Yes, you can use any sugar, but pink sugar adds a fun touch to the rim!


Nutritious foods for your week

Nutritious foods for your week


Introduction

Eating healthy during the week doesn’t have to be hard! This recipe for nutritious foods is simple, tasty, and will help you feel great. With a mix of eggs, veggies, and toast, it’s a perfect way to fuel your day!

Why Make This Recipe

You should make this recipe because it’s quick and easy! It combines lots of healthy ingredients that are good for your body. Plus, it’s delicious! Your family will love it, and you’ll enjoy knowing they are eating something nutritious.

How to Make Nutritious Foods for Your Week

Ingredients:

  • Huevos (Eggs)
  • Champiñones (Mushrooms)
  • Aguacate (Avocado)
  • Pan tostado (Toast)
  • Queso (Cheese)
  • Tomate (Tomato)
  • Espinacas (Spinach)
  • Brócoli (Broccoli)

Directions:

  1. For the scrambled eggs, beat the eggs and cook them in a pan with a little oil. Add in mushrooms and avocado to taste.
  2. Toast the bread and add cheese on top. Then, place the scrambled eggs, avocado, tomato, and spinach on the toast.
  3. A fun variation is to include broccoli along with the mushrooms and avocado in the scrambled eggs.

How to Serve Nutritious Foods for Your Week

Serve this dish warm right after cooking. You can place the toast on a nice plate and make it look appealing by adding some extra veggies on the side. A colorful plate always makes food taste better!

How to Store Nutritious Foods for Your Week

If you have leftovers, place them in an airtight container in the fridge. It’s best to eat them within two days. To reheat, just warm everything up in a pan. The taste will still be yummy!

Tips to Make Nutritious Foods for Your Week

  • Use fresh ingredients for the best flavor.
  • You can add spices like salt and pepper to enhance the taste.
  • If you like heat, consider adding some chili flakes to the scrambled eggs.

Variation

You can change up the veggies based on what you have at home. Try adding bell peppers or zucchini for a different flavor.

FAQs

1. Can I make this recipe ahead of time?
Yes! You can prepare the scrambled eggs and toast in advance. Just heat them up when you’re ready to eat.

2. What can I do if I don’t like broccoli?
No problem! You can skip the broccoli and use other veggies like peppers or leave it out completely.

3. Is this recipe good for kids?
Absolutely! Kids usually love this dish. It’s colorful and fun, plus they can help make it too!

Chocolate Ganache and Raspberry Tart

Chocolate Ganache and Raspberry Tart


Introduction

If you love chocolate and berries, you’ll adore this Chocolate Ganache and Raspberry Tart! It’s rich, sweet, and has a refreshing twist. Perfect for special occasions or just a weekend treat.

Why Make This Recipe

This tart is not only delicious but also surprisingly easy to make. It’s a showstopper that will impress your friends and family. The smooth chocolate ganache paired with tangy raspberries creates the perfect bite. Plus, it’s a great dessert to share on holidays or celebrations!

How to Make Chocolate Ganache and Raspberry Tart

Ingredients:

  • 1 cup boiling water
  • 2 cups all-purpose flour
  • 2 cups granulated sugar
  • 1 cup heavy cream
  • 2 large eggs
  • 3/4 cup unsweetened cocoa powder
  • 2 teaspoons baking powder
  • 1 tablespoon cornstarch
  • 1 teaspoon salt
  • 1 teaspoon espresso powder
  • 1/2 cup vegetable oil
  • 8 ounces semi-sweet chocolate, chopped
  • Juice of 1 lemon
  • 2 teaspoons vanilla extract
  • 2 cups raspberries
  • 1 1/2 teaspoons baking soda
  • Fresh raspberries (for decoration)
  • Shaved chocolate pieces (for decoration)

Directions:

  1. Preheat your oven to 350°F (175°C). Grease and flour two 9-inch cake pans and set aside.

  2. In a large bowl, combine the flour, sugar, cocoa powder, baking powder, baking soda, salt, and espresso powder. Mix well.

  3. Add the buttermilk, vegetable oil, eggs, and vanilla extract to the dry ingredients. Mix until everything is combined.

  4. Carefully add the boiling water. The mixture will be quite liquid, but this helps make a moist cake.

  5. Pour the mixture into the prepared pans.

  6. Bake in the preheated oven for 30-35 minutes. Check if it’s done by inserting a toothpick; if it comes out clean, it’s ready! Let the cakes cool in the pans for 10 minutes, then move them to a wire rack to cool completely.

  7. While the cakes cool, make the raspberry compote. In a saucepan over medium heat, combine the raspberries, sugar, cornstarch, and lemon juice. Cook until it thickens, then let it cool.

  8. Now prepare the chocolate ganache. Heat the heavy cream in a small saucepan over medium heat until it begins to boil. Pour it over the chopped chocolate in a bowl and let it sit for 1-2 minutes. Stir until it’s smooth and silky.

  9. For assembly, place one layer of cake on a serving plate. Spread a generous amount of raspberry compote over the first layer. Top with another layer of cake and repeat until all layers are used, ensuring the last layer is covered with the ganache.

  10. Finish by decorating the tart with fresh raspberries and chocolate shavings for a special touch.

How to Serve Chocolate Ganache and Raspberry Tart

Serve slices of this tart chilled or at room temperature. It’s great on its own or with a dollop of whipped cream on top!

How to Store Chocolate Ganache and Raspberry Tart

You can keep the tart in the refrigerator for up to 3 days. Make sure to cover it to keep it fresh. If you have leftovers, just slice and store.

Tips to Make Chocolate Ganache and Raspberry Tart

  • Let the cakes cool completely before assembling. This prevents the ganache from melting.
  • Use fresh raspberries for the best flavor, but frozen can work too if fresh ones aren’t available.
  • Make the raspberry compote ahead of time to save during assembly.

Variation

You can swap the raspberries for other berries such as strawberries or blueberries. Just adjust the sweetness in the compote to your taste!

FAQs

Can I use other types of chocolate?
Yes! You can use milk chocolate if you prefer a sweeter flavor.

What if I don’t have heavy cream?
You can substitute it with full-fat coconut milk for a dairy-free version!

Can I make this tart ahead of time?
Absolutely! You can make it up to a day in advance. Just store in the fridge until you’re ready to serve.


Milk Cake of Rosa

Milk Cake of Rosa


Introduction

Milk Cake of Rosa is a lovely dessert that brings joy to every gathering! With a soft texture and sweet rose flavor, it’s a treat for everyone. Whether it’s a special occasion or a cozy family dinner, this cake can shine on any table.

Why Make This Recipe

You should definitely try making the Milk Cake of Rosa because it’s simple, quick, and delicious! It’s perfect for weekends when you want to bake something special. Plus, your family will love the flavors and the beautiful presentation. Once you try it, it might just become your new favorite!

How to Make Milk Cake of Rosa

Making this cake is easy! Just follow these steps:

Ingredients:

  • 1 1/2 cups all-purpose flour
  • 1 teaspoon baking powder
  • 1/2 teaspoon baking soda
  • 1/4 teaspoon salt
  • 1/2 cup unsalted butter, melted
  • 3/4 cup granulated sugar
  • 1/2 cup yogurt
  • 1/2 cup milk
  • 1 tablespoon rose syrup (Rooh Afza)
  • 1 teaspoon vanilla extract
  • 1/2 cup condensed milk
  • 1/2 cup whole milk
  • 1/4 cup heavy cream
  • 1 tablespoon rose syrup
  • 1 cup whipped cream
  • 2 tablespoons chopped pistachios
  • 1 tablespoon dried rose petals

Directions:

  1. Preheat your oven to 350°F (175°C) and grease a cake pan.
  2. In one bowl, mix together the flour, baking powder, baking soda, and salt. In another bowl, beat the melted butter, sugar, yogurt, milk, rose syrup, and vanilla until smooth. Now, combine the wet and dry ingredients.
  3. Pour the batter into the prepared pan and bake for 30-35 minutes. Let it cool completely afterward.
  4. While the cake is cooling, prepare the milk mixture. Combine the condensed milk, whole milk, heavy cream, and an additional tablespoon of rose syrup in a bowl.
  5. Once the cake has cooled, poke holes in the top and pour the milk mixture evenly over it. Chill the cake in the refrigerator for 1 hour.
  6. Finally, cover the cake with whipped cream, sprinkle with chopped pistachios, and garnish with dried rose petals. Slice it up and enjoy!

How to Serve Milk Cake of Rosa

Serve this beautiful cake chilled. It’s perfect as a dessert after dinner or as a sweet treat during tea time. You can slice it and place it on plates for everyone to enjoy.

How to Store Milk Cake of Rosa

If you have leftovers, store the cake in an airtight container in the refrigerator. It will stay fresh for about 3 to 4 days. Make sure to keep the whipped cream topping separate if possible, so it stays fluffy!

Tips to Make Milk Cake of Rosa

  • Make sure your ingredients are at room temperature for the best results.
  • You can adjust the amount of rose syrup according to your taste.
  • Always check the cake with a toothpick to ensure it’s cooked through; it should come out clean.

Variation

You can try adding some chopped nuts, like almonds or walnuts, to the cake batter for an extra crunch. You can also swap the rose syrup for other flavors like saffron or cardamom for a different twist!

FAQs

  1. Can I use low-fat milk for this cake?
    Yes, you can use low-fat milk, but the cake might be slightly less rich.

  2. Can I make this cake ahead of time?
    Absolutely! This cake can be made a day in advance. Just keep it in the fridge and add the toppings before serving.

  3. What if I don’t have rose syrup?
    If you can’t find rose syrup, you can use any other flavored syrup, or simply skip it for a plain milk cake.

Sublime Black Velvet Delight

If you’re looking for a dessert that’s rich, moist, and simply amazing, then you must try this Sublime Black Velvet Delight. This cake is a chocolate lover’s dream and will become a favorite for any occasion. With its deep color and luscious frosting, it’s sure to impress your family and friends!

Why Make This Recipe

Making this Sublime Black Velvet Delight is not just about satisfying a sweet tooth; it’s an experience filled with smiles and delicious moments. It’s perfect for birthdays, celebrations, or just a cozy weekend at home. Once you try it, you’ll want to bake it over and over again!

How to Make Sublime Black Velvet Delight

Ingredients

  • 1 3/4 cups all-purpose flour
  • 1 1/2 cups granulated sugar
  • 3/4 cup unsweetened cocoa powder (preferably dark or black cocoa)
  • 1 1/2 tsp baking soda
  • 1 tsp baking powder
  • 1 tsp salt
  • 2 large eggs
  • 1 cup buttermilk
  • 1/2 cup vegetable oil
  • 2 tsp vanilla extract
  • 1 cup boiling water
  • 1 cup unsalted butter, softened
  • 3 cups powdered sugar
  • 1/2 cup cocoa powder
  • 2 tsp vanilla extract
  • 4-5 tbsp milk or heavy cream

Directions

  1. Preheat your oven to 350°F (175°C). Grease and flour two 9-inch round cake pans or line them with parchment paper.
  2. In a large bowl, mix the flour, sugar, cocoa powder, baking soda, baking powder, and salt together until they are combined well.
  3. Add the eggs, buttermilk, vegetable oil, and vanilla extract to the dry ingredients. Beat until the mixture is smooth.
  4. Slowly stir in the boiling water. Don’t worry if the batter looks thin; that’s normal!
  5. Divide the batter evenly between the prepared pans.
  6. Bake for 30-35 minutes, or until a toothpick inserted in the center comes out clean.
  7. Let the cakes cool in the pans for 10 minutes before moving them to a wire rack to cool completely.
  8. For the frosting, whip the softened butter until it’s creamy.
  9. Sift the powdered sugar and cocoa powder together, then mix them into the butter until well combined.
  10. Add in the vanilla extract and 4 tablespoons of milk (or heavy cream). Beat until the frosting is smooth. If it’s too thick, add more milk one tablespoon at a time until it’s spreadable.
  11. Place one cooled cake layer on a serving plate. Spread a thick layer of frosting on top.
  12. Add the second cake layer and frost the top and sides.
  13. For a fancy touch, decorate with chocolate shavings, edible glitter, or fresh berries.

How to Serve Sublime Black Velvet Delight

Slice the cake into generous pieces and serve it on a pretty plate. It’s delicious on its own or you can pair it with a scoop of vanilla ice cream for an extra treat!

How to Store Sublime Black Velvet Delight

You can keep the cake in an airtight container at room temperature for up to three days. If you need to store it longer, keep it in the fridge for up to a week. Make sure to cover the cake with plastic wrap or foil to keep it fresh.

Tips to Make Sublime Black Velvet Delight

  • Make sure your ingredients are at room temperature for better mixing.
  • Don’t skip the boiling water step; it helps keep the cake moist.
  • Use quality cocoa powder for a richer chocolate flavor.

Variation

You can add chocolate chips to the batter for extra chocolatey goodness, or swap out the frosting for cream cheese frosting for a different twist.

FAQs

1. Can I use a different type of flour?
Yes, you can use gluten-free flour if you need a gluten-free option, but the texture might vary.

2. What if I don’t have buttermilk?
You can make your own buttermilk by mixing 1 cup of milk with 1 tablespoon of vinegar or lemon juice. Let it sit for about 5 minutes before using.

3. Can I freeze the cake?
Absolutely! You can freeze the unfrosted cake layers. Just wrap them well in plastic wrap and then in foil for up to three months. Thaw in the fridge before frosting.

Incredible work 😍.

Incredible Work 😍


Incredible work is a delightful and satisfying dish that everyone will love. It is perfect for any occasion and can be enjoyed by family and friends. This recipe is simple and quick to make, so let’s dive in!

Why Make This Recipe

You should make incredible work because it is not only tasty but also easy to prepare. This dish can bring joy to your table and impress your guests. Plus, it’s a great way to try something new!

How to Make Incredible Work

Ingredients:

  • [List your ingredients here]

Directions:

  1. Start by preparing all your ingredients.
  2. Follow the steps below:
    • [Step 1]
    • [Step 2]
    • [Step 3]
  3. Cook until everything is well combined and ready.

How to Serve Incredible Work

Serve incredible work hot or warm. You can add a garnish or side dish to make it even better. Enjoy it with your favorite drink!

How to Store Incredible Work

You can store any leftovers in an airtight container in the fridge. It should stay fresh for a few days. Just reheat it before serving again.

Tips to Make Incredible Work

  • Always measure your ingredients for the best results.
  • Taste as you go to adjust flavors.
  • Don’t rush the cooking time; let it simmer if needed.

Variation

You can easily change up this recipe by adding different ingredients, such as vegetables, proteins, or spices to suit your taste!

FAQs

1. Can I make this recipe ahead of time?
Yes, you can prepare it in advance and store it in the fridge. Just reheat before serving.

2. What can I pair with incredible work?
It goes well with rice, bread, or a light salad.

3. Is this recipe suitable for kids?
Absolutely! It is easy to make and fun to eat, making it a great choice for kids.


Banana and Blueberry Smoothie

Banana and Blueberry Smoothie


Introduction

A Banana and Blueberry Smoothie is a delicious and refreshing way to start your day. It’s quick to make and packed with flavor and nutrients. With the creaminess of yogurt and the natural sweetness of honey, this smoothie is a treat your whole family will enjoy!

Why Make This Recipe

Making this smoothie is perfect for busy mornings or when you need a quick snack. It’s healthy and keeps you full, thanks to the bananas and yogurt. Plus, everyone loves the sweet and fruity taste! You can whip it up in just a few minutes—an excellent choice for any day of the week!

How to Make Banana and Blueberry Smoothie

Ingredients:

  • 2 ripe bananas
  • 150 g of blueberries (fresh or frozen)
  • 200 g of natural yogurt
  • 2 tablespoons of honey
  • 250 ml of almond milk

Directions:

  1. Prepare the Ingredients: Peel the bananas and cut them into chunks. If you use frozen blueberries, let them thaw slightly.
  2. Blend: In a blender, add the banana chunks, blueberries, yogurt, honey, and almond milk.
  3. Blend Until Smooth: Mix on high speed until the mixture is smooth and creamy. If it’s too thick, you can add a little more almond milk to get the right consistency.
  4. Taste: Give the smoothie a taste and adjust the honey if you want it sweeter.
  5. Serve: Pour the smoothie into glasses and serve immediately. You can garnish with a few more blueberries or a banana slice on the rim for a nice touch.

How to Serve Banana and Blueberry Smoothie

Serve your smoothie fresh in a glass. You can enjoy it on its own or pair it with a light breakfast, like toast or oatmeal. It’s also a great option for a post-workout snack!

How to Store Banana and Blueberry Smoothie

If you have any leftover smoothie, store it in the fridge in an airtight container. It’s best to drink it within a day for the freshest taste. You can also freeze it in individual servings for a quick grab-and-go snack later!

Tips to Make Banana and Blueberry Smoothie

  • Use ripe bananas for a sweeter flavor.
  • If you’re in a hurry, you can prepare the ingredients the night before and blend them in the morning.
  • Experiment with different fruits like strawberries or spinach for added nutrition.

Variation

Try adding a scoop of protein powder or some spinach for an extra health boost. You can also swap almond milk for any milk of your choice, such as oat milk or dairy milk.

FAQs

1. Can I use frozen bananas?
Yes, frozen bananas work well in this recipe and give the smoothie a nice creamy texture.

2. Is this smoothie vegan?
You can make it vegan by using plant-based yogurt and honey alternatives like maple syrup or agave nectar.

3. Can I use other berries?
Absolutely! Feel free to mix in or substitute with other berries like strawberries or raspberries for a different flavor.


Triple Decadent Chocolate Mousse Cake

If you love chocolate, you’re in for a real treat! The Triple Decadent Chocolate Mousse Cake is a rich and creamy dessert that will satisfy your sweet tooth. It’s perfect for birthday parties, special occasions, or just a relaxing weekend at home. Everyone in your family will adore it!

Why Make This Recipe

This cake is not only delicious but also easy to make. You can whip it up for a dinner party and impress your friends or make it just for fun. Plus, the combination of cream cheese, whipped cream, and chocolate makes for a dreamy texture that is hard to resist. Once you slice into it, you’ll see happy faces all around!

How to Make Triple Decadent Chocolate Mousse Cake

Ingredients:

  • 1 cup graham cracker crumbs
  • 1/4 cup melted butter
  • 2 cups cream cheese, softened
  • 1 cup powdered sugar
  • 1 teaspoon vanilla extract
  • 1 cup heavy cream
  • 1/4 cup cocoa powder
  • Chocolate shavings and chocolate truffles (for decoration)

Directions:

  1. Start by preheating your oven to 350°F (175°C).
  2. Prepare the chocolate cookie crust according to the package instructions.
  3. Press the mixture into the bottom of a 9-inch pie dish to form the crust.
  4. Bake for about 10 minutes until firm, then let it cool completely.
  5. In a large mixing bowl, beat the softened cream cheese until smooth.
  6. Gradually add in the powdered sugar and vanilla extract, mixing until everything is well combined.
  7. Pour the cream cheese mixture over the cooled crust and spread it evenly.
  8. Refrigerate the cheesecake for at least 2 hours until firm.
  9. After the cheesecake is ready, make the chocolate topping. In a bowl, beat the heavy cream with cocoa powder until stiff peaks form.
  10. Spread the whipped cream evenly over the chilled cheesecake.
  11. Sprinkle chocolate shavings on top of the whipped cream layer and place a chocolate truffle in the center.
  12. Place the cheesecake in the fridge to chill for another hour before serving.

This dish is perfect for a satisfying dessert that combines the rich and creamy flavors of chocolate mousse with the delightful crunch of chocolate shavings. Enjoy your delicious Triple Decadent Chocolate Mousse Cake!

How to Serve Triple Decadent Chocolate Mousse Cake

Slice your chocolate mousse cake into pieces and serve it chilled. You can pair it with fresh berries, a drizzle of chocolate sauce, or just enjoy it on its own!

How to Store Triple Decadent Chocolate Mousse Cake

Keep the leftovers in the refrigerator. Cover the cake well so it doesn’t absorb any odors. Enjoy it within three days for the best taste.

Tips to Make Triple Decadent Chocolate Mousse Cake

  • Make sure your cream cheese is at room temperature for easier mixing.
  • Whip the cream until it forms stiff peaks for a fluffy topping.
  • Feel free to add more chocolate shavings or a whipped cream swirl for decoration!

Variation

You can use different types of chocolate or add a layer of fruit, like raspberries, for a new twist.

FAQs

1. Can I make this cake ahead of time?
Yes, this cake can be made a day before. Just keep it covered in the fridge.

2. Is there a way to make this cake gluten-free?
Absolutely! Use gluten-free graham cracker crumbs for the crust.

3. Can I use a different type of cheese?
You can try mascarpone or ricotta cheese for a different flavor, but cream cheese is recommended for the best texture.

Strawberry Drip Cake

Strawberry Drip Cake


Introduction

If you want a dessert that looks stunning and tastes amazing, the Strawberry Drip Cake is the one for you! This cake combines soft layers of vanilla cake with sweet strawberry puree and a beautiful white chocolate drizzle. Perfect for birthdays, special occasions, or a fun weekend treat, this cake is sure to impress family and friends.

Why Make This Recipe

Making a Strawberry Drip Cake is not just about tasting deliciousness; it’s about creating wonderful memories in the kitchen! I love how this cake brings everyone together, from mixing the batter to decorating it with fresh strawberries. Plus, it’s an eye-catching centerpiece for any table. You’ll make it often once you see the happy faces when they take a bite!

How to Make Strawberry Drip Cake

Ingredients:

  • 2 1/2 cups all-purpose flour
  • 2 1/2 teaspoons baking powder
  • 1/2 teaspoon salt
  • 1 cup unsalted butter, softened
  • 2 cups granulated sugar
  • 4 large eggs
  • 1 cup whole milk
  • 1 tablespoon vanilla extract
  • 1/2 cup strawberry puree
  • 1 1/2 cups unsalted butter, softened (for frosting)
  • 6 cups powdered sugar
  • 1/2 cup strawberry puree (for frosting)
  • 1 teaspoon vanilla extract (for frosting)
  • 1 cup white chocolate chips (for drip)
  • 1/2 cup heavy cream
  • Fresh strawberries (for decoration)
  • Sprinkles (for decoration)

Directions:

  1. Preheat the oven to 350°F (175°C). Grease and flour three 8-inch cake pans.
  2. In a bowl, mix the flour, baking powder, and salt. Set it aside.
  3. In another bowl, cream the butter and sugar together until light and fluffy. Add the eggs one by one, mixing well after each. Stir in the vanilla extract.
  4. Gradually add the dry ingredients to the wet mixture, alternating with the milk, until combined. Then, fold in the strawberry puree.
  5. Divide the batter into the prepared pans and bake for 25-30 minutes or until a toothpick comes out clean. Let them cool completely.
  6. For the frosting: Beat the butter until creamy. Add the powdered sugar, strawberry puree, and vanilla extract, and beat until smooth.
  7. Stack the cake layers, spreading frosting between each layer and around the sides of the cake.
  8. For the drip: Melt the white chocolate chips and heavy cream in the microwave in 30-second bursts, stirring until smooth. Let it cool slightly.
  9. Pour the ganache over the cake, letting it drip down the sides.
  10. Decorate with fresh strawberries and sprinkles before serving.

How to Serve Strawberry Drip Cake

Slice the Strawberry Drip Cake into generous pieces and serve it on nice plates. It pairs wonderfully with whipped cream or a scoop of vanilla ice cream on the side. Perfect for any gathering!

How to Store Strawberry Drip Cake

Store any leftover cake in an airtight container. It can be kept in the refrigerator for up to 5 days. If you want to keep it longer, you can freeze the cake for up to 2 months. Just ensure it’s wrapped well!

Tips to Make Strawberry Drip Cake

  • Make sure your butter and eggs are at room temperature for the best texture.
  • Don’t overmix when you combine the wet and dry ingredients. Mixing just until combined is key!
  • If your ganache is too thick, you can warm it slightly to get the right pouring consistency.

Variation

You can easily change this recipe by using different fruit purees, like raspberry or blueberry, for a different flavor. You can also add lemon zest to the batter for a refreshing twist!

FAQs

1. Can I use frozen strawberries for the puree?
Yes, frozen strawberries work well! Just thaw them and blend until smooth.

2. What if I don’t have white chocolate chips?
You can use dark chocolate or milk chocolate chips instead for the drip.

3. How can I make this cake gluten-free?
You can replace the all-purpose flour with a gluten-free blend. Just check the packaging for equivalent measurements.

Enjoy your baking adventure with this Strawberry Drip Cake! It’s a delightful treat you’ll love to share!

Exit mobile version