Snacks 🤤

Snacks are quick and tasty treats that everyone loves. They are perfect for any time of the day. Whether you need a little pick-me-up between meals or a fun treat for a gathering, snacks can make it all better.

Why Make This Recipe

Making snacks at home is easy and rewarding. You can choose the flavors you love and control the ingredients. Plus, homemade snacks are often healthier than store-bought options. This recipe for snacks will impress your friends and family, and it’s simple enough for anyone to try!

How to Make Snacks

Ingredients:

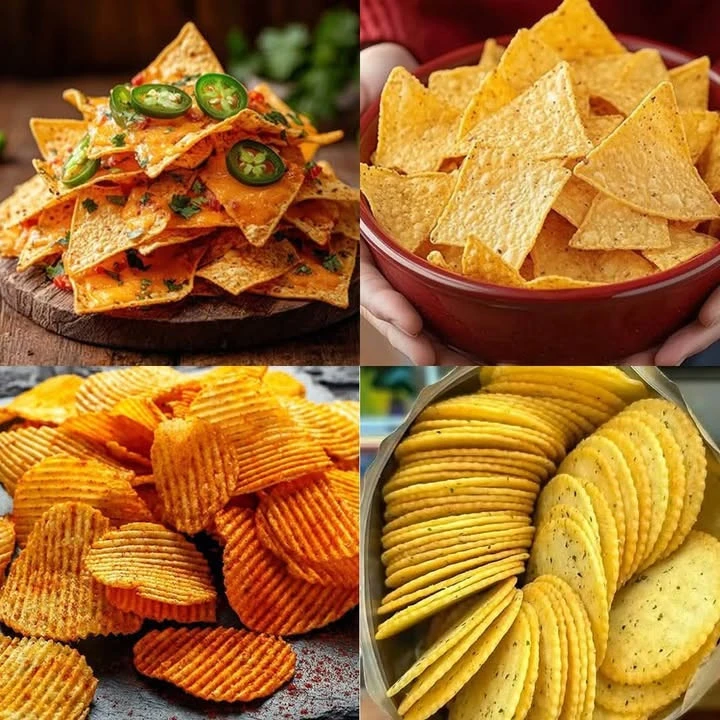
  • Your choice of base (crackers, chips, or veggie sticks)
  • Dip or topping (hummus, guacamole, salsa, or cheese)
  • Optional extras (chopped vegetables, nuts, or seeds)

Directions:

  1. Start by choosing your base. Place crackers, chips, or veggie sticks on a serving plate.
  2. Pick a dip or topping that you like and place it in a bowl.
  3. If you want, chop up some vegetables or add nuts and seeds on top of the dip for extra flavor.
  4. Serve immediately and enjoy!

How to Serve Snacks

You can serve snacks as party appetizers or enjoy them during movie nights. Arrange them nicely on a platter with a variety of dips. This makes it fun and inviting for guests.

How to Store Snacks

If you have leftover snacks, store them in an airtight container. Keep dips in the fridge to keep them fresh. Most snacks are best enjoyed the same day, but they can last for a few days if stored properly.

Tips to Make Snacks

  • Choose fresh ingredients for the best taste.
  • Experiment with different flavors and textures.
  • Add a bit of spice or herbs for extra flavor.
  • Make a variety of snacks to please everyone.

Variation

You can easily change this recipe based on your mood. For example, try different dips like ranch, tzatziki, or spicy mustard. You can also switch the base with fruits like apple slices or bananas for a sweet twist.

FAQs

1. Can I make snacks ahead of time?
Yes, you can prepare some parts ahead of time, like dips, and just assemble everything when you are ready to serve.

2. What can I use as a base for snacks?
You can use crackers, chips, veggie sticks, or even fruits like apple slices or pita bread.

3. How long do homemade snacks last?
Homemade snacks are best eaten fresh, but they can last in the fridge for a few days if stored correctly.

Chocolate buttermilk cake

Chocolate Buttermilk Cake


Introduction

If you’re looking for a cake that is rich, moist, and full of chocolate flavor, you’ve come to the right place! This Chocolate Buttermilk Cake is a treat everyone will love. Whether it’s for a birthday, a holiday, or just a simple dessert, this cake will surely bring smiles all around the table.

Why Make This Recipe

This recipe is super easy and uses common ingredients. It’s perfect for busy weekdays or relaxing weekends when you want something sweet but don’t want to spend all day in the kitchen. Plus, the buttermilk adds a nice richness that makes the cake even more delicious!

How to Make Chocolate Buttermilk Cake

Ingredients:

  • 2 cups all-purpose flour
  • 2 cups granulated sugar
  • 3/4 cup unsweetened cocoa powder
  • 2 teaspoons baking powder
  • 1 1/2 teaspoons baking soda
  • 1 teaspoon salt
  • 1 cup buttermilk (at room temperature)
  • 1/2 cup vegetable oil
  • 2 large eggs (at room temperature)
  • 2 teaspoons vanilla extract
  • 1 cup hot water
  • 1 cup unsalted butter (softened)
  • 3 1/2 cups powdered sugar
  • 1/2 cup unsweetened cocoa powder
  • 1/2 cup buttermilk (at room temperature)
  • 2 teaspoons vanilla extract
  • A pinch of salt

Directions:

  1. Preheat your oven to 350°F (175°C). Grease and flour two 9-inch round cake pans.
  2. In a large bowl, mix the flour, sugar, cocoa powder, baking powder, baking soda, and salt together.
  3. Add the buttermilk, vegetable oil, eggs, and vanilla extract to the dry ingredients. Mix until well combined.
  4. Gradually stir in the hot water. The batter will be thin, but that’s just right!
  5. Pour the batter into the prepared pans and bake for 30-35 minutes. Check if a toothpick comes out clean when inserted into the center.
  6. Let the cakes cool in the pans for 10 minutes before moving them to a wire rack to cool completely.
  7. For the frosting, beat the softened butter until creamy. Gradually mix in the powdered sugar and cocoa powder.
  8. Add the buttermilk, vanilla extract, and a pinch of salt. Beat until the frosting is smooth and fluffy.
  9. Once the cakes are cool, spread frosting on top of one cake layer, place the second layer on top, and frost the top and sides.

How to Serve Chocolate Buttermilk Cake

Slice this delectable cake and serve it on a nice plate. It’s great on its own or with a scoop of vanilla ice cream. Don’t forget to enjoy it with your family and friends!

How to Store Chocolate Buttermilk Cake

Keep any leftover cake in an airtight container at room temperature for a couple of days. If you want it to last longer, put it in the fridge. Just let it warm up a bit before serving again.

Tips to Make Chocolate Buttermilk Cake

  • Make sure your eggs and buttermilk are at room temperature for the best results.
  • If you don’t have buttermilk, you can sour regular milk by adding a bit of vinegar or lemon juice and letting it sit for a few minutes.
  • For a fun twist, try adding chocolate chips or nuts to the batter!

Variation

Feel free to add a layer of raspberry or cherry jam between the cake layers for a fruity surprise. You can also use a chocolate ganache instead of frosting for a different flavor.

FAQs

  1. Can I use cake flour instead of all-purpose flour?
    Yes, you can use cake flour, but the texture may be a bit lighter and fluffier.

  2. What can I do if I don’t have buttermilk?
    You can make your own by adding 1 tablespoon of vinegar or lemon juice to milk and letting it sit for a few minutes.

  3. How can I make this cake dairy-free?
    Use a dairy-free milk and a dairy-free butter substitute. Check that your cocoa powder is dairy-free as well.


Homemade Vanilla Ice Cream

Homemade Vanilla Ice Cream


Introduction

Homemade vanilla ice cream is one of life’s sweetest pleasures. It’s creamy, smooth, and full of rich vanilla flavor. Making this treat at home is easier than you might think, and it’s a fun activity to do with family or friends. You can serve it in bowls, or cones, or even on top of your favorite pie!

Why Make This Recipe

You should make this vanilla ice cream because it’s simple and delicious! There’s nothing quite like a scoop of creamy ice cream on a hot day or as a dessert after dinner. Plus, it’s way better than store-bought. You get to use fresh ingredients and customize the flavor just how you like it.

How to Make Homemade Vanilla Ice Cream

Ingredients:

  • 2 cups (480ml) heavy cream
  • 1 cup (240ml) whole milk
  • 3/4 cup (150g) granulated sugar
  • 1 vanilla bean (or 2 teaspoons pure vanilla extract)
  • 4 large egg yolks
  • A pinch of salt

Directions:

  1. In a medium saucepan, combine the heavy cream, milk, and half of the sugar. Split the vanilla bean lengthwise and scrape out the seeds. Add both the seeds and the pod to the saucepan. Heat the mixture over medium heat until it begins to steam (don’t let it boil).
  2. In a separate bowl, whisk the egg yolks with the remaining sugar and salt until the mixture is pale and creamy.
  3. Slowly pour a small amount of the hot cream mixture into the egg yolks while whisking constantly. This will prevent the yolks from scrambling. Gradually add the tempered yolks back into the saucepan with the cream mixture.
  4. Cook the mixture over low heat, stirring constantly, until it thickens and coats the back of a spoon (170–175°F or 77–80°C). Remove from heat and strain the cream through a fine-mesh sieve to discard the vanilla pod and any lumps.
  5. Let the mixture cool to room temperature, then cover and refrigerate for at least 4 hours or overnight for the best flavor.
  6. Once chilled, pour the mixture into an ice cream maker and churn according to the manufacturer’s instructions until thick and creamy.
  7. Transfer the ice cream to an airtight container and freeze for at least 4 hours to firm up.
  8. Serve in bowls or cones and enjoy the rich goodness of homemade vanilla!

How to Serve Homemade Vanilla Ice Cream

You can serve homemade vanilla ice cream in a bowl or a cone. It’s delicious on its own or topped with chocolate syrup, fresh fruit, or sprinkles. It’s also great with warm desserts like apple pie or brownies!

How to Store Homemade Vanilla Ice Cream

To store the ice cream, keep it in an airtight container in the freezer. It can last for about two weeks. Just remember to let it sit out for a few minutes before serving if it gets too hard.

Tips to Make Homemade Vanilla Ice Cream

  • Use fresh ingredients for the best flavor.
  • Don’t rush the chilling process; the longer it cools, the better it will taste.
  • If you don’t have a vanilla bean, pure vanilla extract works perfectly too.

Variation

If you want to change things up, you can add mix-ins like chocolate chips, crushed cookies, or fruit. Just fold them in when the ice cream is almost done churning.

FAQs

Can I make this ice cream without an ice cream maker?
Yes! You can freeze the mixture in a container and stir it every 30 minutes until it’s creamy.

How long does homemade vanilla ice cream last?
It lasts about two weeks in the freezer if stored properly in an airtight container.

Can I use low-fat milk instead of whole milk?
You can, but the ice cream may not be as creamy. Heavy cream is key to a rich taste!

Brownie Pizza with Peanut Butter

Brownie Pizza with Peanut Butter


Introduction

Welcome to the delicious world of Brownie Pizza with Peanut Butter! This dessert combines the rich taste of brownies with the creamy goodness of peanut butter and candy toppings. It’s a fun and indulgent treat that everyone will love!

Why Make This Recipe

You should make this Brownie Pizza because it’s incredibly easy and quick to prepare. Perfect for family gatherings or a cozy night in, it brings smiles to everyone’s faces. It’s great for weekends when you’re in the mood for something sweet, and it’s sure to impress your guests!

How to Make Brownie Pizza

Ingredients:

  • 2 oz unsweetened chocolate, melted
  • 1/3 cup canola oil
  • 1 cup granulated sugar
  • 2 large eggs
  • 3/4 cup all-purpose flour
  • 1/2 teaspoon salt
  • 1/2 cup chocolate chips
  • 1 cup chopped candy (like peanut butter cups, Snickers, 3 Musketeers)
  • 1/4 cup Reese’s Pieces or M&Ms

Directions:

  1. Preheat your oven to 350°F (175°C).
  2. In a bowl, mix the melted chocolate with the oil and sugar until well combined. Add the eggs and whisk until smooth.
  3. Stir in the flour and salt until just combined.
  4. Spread the mixture evenly in a pizza pan.
  5. Bake for 20-25 minutes or until a toothpick comes out clean.
  6. Remove from the oven and sprinkle the chocolate chips evenly over the brownie. Bake for an additional 2 minutes until the chocolate melts.
  7. Take it out of the oven and top with the chopped candies and Reese’s Pieces or M&Ms.
  8. Allow to cool before slicing into wedges.
  9. Enjoy this decadent Peanut Butter Brownie Pizza as a sweet treat!

How to Serve Brownie Pizza

You can serve your Brownie Pizza warm or at room temperature. Cut it into wedges and enjoy it with a scoop of vanilla ice cream on the side for an extra special treat!

How to Store Brownie Pizza

To store your Brownie Pizza, keep any leftovers in an airtight container at room temperature for up to 2-3 days. If you want to keep it longer, you can refrigerate it for up to a week.

Tips to Make Brownie Pizza

  • Make sure your chocolate is melted but not too hot, or it might cook the eggs.
  • Don’t overmix the batter; mixing just until combined will make your brownies nice and fudgy.
  • Experiment with different candy toppings for a unique twist on this recipe!

Variation

You can swap the peanut butter candies for your favorite chocolate bars or even add nuts for some crunch. The possibilities are endless!

FAQs

Q: Can I use cocoa powder instead of unsweetened chocolate?
A: Yes, you can use cocoa powder! Just use 1/2 cup of cocoa powder and add an extra tablespoon of oil to compensate for the fat.

Q: How do I know when my brownie pizza is done?
A: The brownie pizza is done when a toothpick inserted in the center comes out clean or with only a few moist crumbs.

Q: Can I freeze Brownie Pizza?
A: Yes, you can freeze individual slices of Brownie Pizza. Just wrap them tightly in plastic wrap and store them in a freezer bag for up to 3 months.

Oreo Fried Cream Cheese Cake Cookies

Are you ready to indulge in a sweet treat that combines two of your favorite snacks? These Oreo Fried Cream Cheese Cake Cookies are crispy on the outside and creamy on the inside. They’re perfect for parties, family gatherings, or just a cozy night at home.

Why Make This Recipe

This recipe is a fun way to enjoy Oreos in a whole new way! It’s easy to make and is sure to impress anyone who takes a bite. The creamy filling and crunchy exterior will have your friends and family asking for more.

How to Make Oreo Fried Cream Cheese Cake Cookies

Let’s dive into how to create these delicious cookies step by step!

Ingredients

  • 8 oz cream cheese, softened
  • 1/4 cup granulated sugar
  • 1/2 teaspoon vanilla extract
  • 1/2 cup crushed Oreos
  • 1 cup all-purpose flour
  • 1/4 cup granulated sugar
  • 1/2 teaspoon baking powder
  • 1/4 teaspoon salt
  • 1 large egg
  • 1 cup milk
  • Vegetable oil, for frying
  • 12 Oreo cookies
  • Powdered sugar, for dusting
  • Additional crushed Oreos, for garnish

Directions

  1. Prepare the Cream Cheese Filling: In a medium bowl, beat the softened cream cheese until smooth. Add the granulated sugar and vanilla extract. Mix until well combined. Gently fold in the crushed Oreos.

  2. Assemble the Oreos: Use a spoon or a small ice cream scoop to put a small amount of the cream cheese filling on each Oreo. Press another Oreo on top to make a sandwich. Repeat with all the Oreos.

  3. Prepare the Batter: In a shallow bowl, mix the flour, sugar, baking powder, and salt. In another bowl, whisk the egg and milk together.

  4. Coat the Oreos: Dip each Oreo sandwich first in the flour mixture, then in the egg mixture, and back into the flour mixture to fully coat them.

  5. Fry the Oreos: Heat vegetable oil in a large pot or deep fryer to 350°F (175°C). Make sure there’s enough oil to fully submerge the Oreos. Carefully place a few coated Oreos into the hot oil, not crowding the pan. Fry for about 2-3 minutes, or until golden brown and crispy. Use a slotted spoon to transfer the fried Oreos to a plate lined with paper towels to drain the excess oil.

  6. Decorate and Serve: Dust the hot fried Oreos with powdered sugar and sprinkle with extra crushed Oreos if desired. Serve them right away while they’re still warm!

How to Serve Oreo Fried Cream Cheese Cake Cookies

These cookies are best served warm. You can enjoy them on their own or with a scoop of ice cream for an extra indulgent treat.

How to Store Oreo Fried Cream Cheese Cake Cookies

If you have leftovers (which is a big ‘if’!), you can store them in an airtight container in the fridge for up to 2 days. Reheat them in the oven or air fryer to make them crispy again.

Tips to Make Oreo Fried Cream Cheese Cake Cookies

  • Make sure the cream cheese is softened to mix easily.
  • Don’t overcrowd the pan while frying to ensure even cooking.
  • Keep the oil temperature steady for the crispiest result.

Variation

You can switch things up by using different types of cookies, like chocolate chip or peanut butter, instead of Oreos for a new flavor twist!

FAQs

1. Can I use low-fat cream cheese?
Yes, low-fat cream cheese can work, but it might be less creamy.

2. How can I know when the oil is ready for frying?
A good test is to drop a small piece of batter into the oil. If it bubbles and rises to the surface, the oil is ready!

3. Can I freeze these cookies?
Yes! You can freeze the assembled but un-fried cookies. Just fry them straight from the freezer when you’re ready to eat.

Enjoy making these delightful Oreo Fried Cream Cheese Cake Cookies and share them with friends and family!

Celestial Chocolate Cheese Trifle

Celestial Chocolate Cheese Trifle


Introduction

If you’re looking for a dessert that’ll wow your family and friends, the Celestial Chocolate Cheese Trifle is it! This dessert layers chocolate cake, creamy cheese, and rich pudding for a sweet treat everyone will love.

Why Make This Recipe

This trifle is easy to make and perfect for any occasion. Whether it’s a family gathering, a birthday party, or simply a sweet ending to your week, this dessert will shine. Plus, it’s fun to make together with loved ones. Trust me, once you bring it out, everyone will be asking for seconds!

How to Make Celestial Chocolate Cheese Trifle

Making this delicious trifle is simple and rewarding. Let’s get started!

Ingredients:

  • 1 package chocolate cake, baked and crumbled
  • 1 package cream cheese, softened
  • 1 cup powdered sugar
  • 1 teaspoon vanilla extract
  • 1 container whipped topping (Cool Whip), thawed
  • 2 cups chocolate pudding
  • 1 cup chocolate sauce or ganache
  • Chocolate truffles or chocolate balls (for decoration)
  • Chocolate shavings (for decoration)

Directions:

  1. Prepare the Cheese Layer: In a large bowl, beat the softened cream cheese, powdered sugar, and vanilla extract until smooth and creamy. Gently fold in half of the whipped topping to create a light and fluffy cheese mixture.
  2. Assemble the Trifle: In a trifle dish or a large glass bowl, start with a layer of crumbled chocolate cake at the bottom. Spread a generous layer of the cream cheese mixture over the cake crumbs. Add a layer of chocolate pudding, spreading it evenly. Drizzle chocolate sauce or ganache over the pudding layer.
  3. Repeat the Layers: Continue alternating layers of crumbled cake, cheese mixture, pudding, and chocolate sauce until the bowl is full. Finish with a final layer of whipped topping on top.
  4. Decorate: Top the trifle with chocolate truffles or chocolate balls for an elegant touch. Sprinkle with chocolate shavings to make it even more decadent.
  5. Chill and Serve: Cover and refrigerate the trifle for at least 1 hour to let the flavors meld together. Serve cold and enjoy this luxurious layered treat!

How to Serve Celestial Chocolate Cheese Trifle

Serve the trifle straight from the fridge. Use a large spoon to scoop generous portions into dessert bowls. Don’t forget to admire the beautiful layers before you dig in!

How to Store Celestial Chocolate Cheese Trifle

You can store any leftovers in the refrigerator for up to 2 days. Just cover it tightly. The flavors will continue to blend, making it taste even better!

Tips to Make Celestial Chocolate Cheese Trifle

  • Make sure your cream cheese is softened for easy mixing.
  • Don’t skip the chilling step; it really helps the flavors develop.
  • Feel free to use store-bought chocolate cake if you’re short on time.

Variation

You can switch things up by using vanilla pudding instead of chocolate pudding or adding fresh fruits like strawberries or raspberries between the layers.

FAQs

1. Can I make this trifle ahead of time?
Yes! It’s great to prepare a day in advance so the flavors meld together beautifully.

2. What other toppings can I use?
In addition to chocolate truffles, you can use nuts, berries, or even whipped cream for extra flair.

3. Is this recipe suitable for kids?
Absolutely! Kids love this dessert, and making it can be a fun family activity. Just keep an eye on younger ones with the chocolate truffles.

Enjoy making this delightful Celestial Chocolate Cheese Trifle! Your family will thank you for it!

Chocolate and Strawberry Cheesecake

Chocolate and Strawberry Cheesecake


Introduction

Chocolate and Strawberry Cheesecake is a delightful dessert that combines rich chocolate flavors with fresh strawberries. If you’re looking for a sweet treat that impresses everyone, this cheesecake is for you. It’s creamy, delicious, and perfect for any occasion!

Why Make This Recipe

You should make this Chocolate and Strawberry Cheesecake because it is easy to put together, and it tastes amazing. The mix of chocolate and strawberries creates a beautiful color and flavor that your family and friends will love. Plus, it’s a great way to celebrate special moments or just enjoy a delicious dessert at home!

How to Make Chocolate and Strawberry Cheesecake

Making this cheesecake is simple and fun! Just follow these easy steps.

Ingredients:

  • 2 cups cream cheese, softened
  • 1/2 cup sugar
  • 1 teaspoon vanilla extract
  • 2 eggs
  • 1/2 cup melted dark chocolate
  • 1/2 cup strawberry puree
  • 1 chocolate cookie crust

Directions:

  1. Preheat your oven to 325°F (160°C).
  2. In a bowl, beat the cream cheese, sugar, and vanilla until smooth.
  3. Add the eggs one at a time, mixing well after each one.
  4. Divide the mixture into two bowls. Mix one half with the melted dark chocolate and the other half with the strawberry puree.
  5. Pour both mixtures into the chocolate cookie crust, alternating spoonfuls.
  6. Use a knife to create gentle swirls between the two mixtures.
  7. Bake for 40 minutes, or until the cheesecake is firm but slightly wobbly in the center.
  8. Let it cool, then refrigerate for at least 4 hours before cutting.

How to Serve Chocolate and Strawberry Cheesecake

When serving the cheesecake, slice it into pieces and consider adding some fresh strawberries on top for an extra touch. This dessert pairs wonderfully with a cup of coffee or tea.

How to Store Chocolate and Strawberry Cheesecake

To store any leftover cheesecake, keep it in the refrigerator. Cover it with plastic wrap or put it in an airtight container to keep it fresh for up to a week.

Tips to Make Chocolate and Strawberry Cheesecake

  • Ensure the cream cheese is softened for easy mixing.
  • Don’t overmix the eggs; just blend them in until combined.
  • For a beautiful presentation, drizzle some melted chocolate or strawberry sauce on top before serving.

Variation

You can also try adding a layer of whipped cream on top for extra creaminess, or switch the strawberry puree for another fruit puree, like raspberry or blueberry.

FAQs

  1. Can I make this cheesecake ahead of time?
    Yes, you can make it a day before your event and just chill it in the refrigerator overnight. It will taste even better!

  2. Can I freeze leftovers?
    Yes, you can freeze the cheesecake! Just wrap it tightly and it will last for up to 3 months in the freezer. Thaw it in the fridge when you’re ready to enjoy it.

  3. What can I use instead of cream cheese?
    You can use mascarpone cheese or Greek yogurt as a lighter alternative, but the texture and flavor will be a bit different.

Enjoy making your Chocolate and Strawberry Cheesecake, and most importantly, have fun sharing it with your loved ones!

Chocolate Explosion Cake

Chocolate Explosion Cake


Introduction

Are you ready for a cake that takes chocolate to the next level? This Chocolate Explosion Cake is exactly what it sounds like—a delicious, rich, and fun dessert that will wow your family and friends! Perfect for any celebration or just a treat for yourself!

Why Make This Recipe

This cake is a chocolate lover’s dream! With layers of rich chocolate cake, creamy chocolate ice cream, and a smooth ganache, it brings happiness to any table. It’s especially great for birthdays, family get-togethers, or weekends when you’re craving something spectacular. Plus, it’s easy to make, ensuring everyone can join in on the fun!

How to Make Chocolate Explosion Cake

Making this Chocolate Explosion Cake is simple and satisfying. You’ll love layering the cake with chocolate goodness. Let’s get started!

Ingredients:

  • 1 3/4 cups all-purpose flour
  • 3/4 cup unsweetened cocoa powder
  • 1 1/2 teaspoons baking powder
  • 1 1/2 teaspoons baking soda
  • 1 teaspoon salt
  • 2 cups granulated sugar
  • 2 large eggs
  • 1 cup whole milk
  • 1/2 cup vegetable oil
  • 2 teaspoons vanilla extract
  • 1 cup boiling water
  • 1 pint chocolate ice cream (slightly softened)
  • 1 cup semi-sweet chocolate chips
  • 1/2 cup heavy cream
  • 1 cup mini chocolate chips
  • 1 cup crushed Oreos
  • 1/2 cup chopped candy bars (like Snickers or Twix)
  • Chocolate sauce (for drizzling)

Directions:
1️⃣ Prepare the Cake Layers: Preheat your oven to 350°F (175°C). Grease and line two 9-inch round cake pans with parchment paper. In a large bowl, sift together the flour, cocoa, baking powder, baking soda, and salt. Add the sugar, eggs, milk, vegetable oil, and vanilla extract. Mix until smooth. Stir in the boiling water; the batter will be thin, which keeps the cake moist. Divide the batter between the prepared pans and bake for 30 to 35 minutes or until a toothpick comes out clean. Let it cool completely.

2️⃣ Mount the Ice Cream Layer: Line one of the 9-inch cake pans with plastic wrap. Spread the softened chocolate ice cream evenly in the pan and freeze until solid, about 2 to 3 hours.

3️⃣ Make the Ganache: Heat the heavy cream in a saucepan over medium heat until it starts boiling. Pour the cream over the chocolate chips. Let it sit for 2 to 3 minutes, then whisk until smooth and shiny. Set aside to cool slightly.

4️⃣ Mount the Cake: Place one cake layer on a serving plate. Spread a thin layer of ganache on top. Gently remove the ice cream layer from the pan using the plastic wrap and place it on top of the first cake. Add the second cake layer on top of the ice cream. Pour the ganache over the whole cake, letting it drizzle down the sides for a beautiful finish.

5️⃣ Add the Explosion Toppings: Immediately sprinkle mini chocolate chips, crushed Oreos, and chopped candy bars on top. Drizzle chocolate sauce over everything for an extra chocolatey touch.

6️⃣ Chill and Serve: Freeze the cake for at least 1 hour to set everything. Slice and serve with more chocolate sauce or whipped cream for a special treat!

How to Serve Chocolate Explosion Cake

You can serve this cake chilled, and it looks gorgeous on a large cake plate. Offer extra chocolate sauce and whipped cream on the side for those who want to indulge more. It’s perfect for birthdays or any party!

How to Store Chocolate Explosion Cake

Store any leftovers in the fridge, covered tightly for up to 3 days. You can also freeze individual slices for a quick chocolate fix later. Just wrap them well and keep them in the freezer.

Tips to Make Chocolate Explosion Cake

  • Ensure the ice cream is softened but not melted when layering.
  • Use high-quality chocolate for the ganache for best flavor.
  • Let the cake cool completely before adding the ganache to avoid melting it.

Variation (if any)

If you want to switch it up, try adding different flavors of ice cream or using a mix of chocolate and caramel sauce for the drizzle!

FAQs

Can I make this cake ahead of time?
Yes! You can bake the cakes and freeze them. Just assemble and add the toppings the day you plan to serve it.

What can I use instead of heavy cream for the ganache?
You can use a dairy-free alternative or even coconut cream if you prefer!

Can I use a different type of cake?
Absolutely! You can use vanilla cake or even red velvet for a fun twist!

Triple Chocolate Pastel Mousse: A Dream Come True!

If you love chocolate, then this Triple Chocolate Mousse Cake is a must-try! It’s rich, creamy, and oh-so-delicious. This cake is perfect for any celebration or just when you want to treat yourself. Trust me, once you try it, you’ll fall in love!

Why Make This Recipe

This recipe is not just about baking; it’s an experience. Imagine layering three types of chocolate mousse over a moist chocolate cake. It impresses everyone at parties and makes family gatherings extra special. Plus, it’s easy and fun to make!

How to Make Triple Chocolate Pastel Mousse

Ingredients:

  • 1 cup (120g) all-purpose flour
  • 1/4 cup (25g) unsweetened cocoa powder
  • 1 teaspoon baking powder
  • 1/2 teaspoon baking soda
  • 1/2 teaspoon salt
  • 3 large eggs
  • 1 cup (200g) granulated sugar
  • 1/2 cup (120ml) buttermilk
  • 1/4 cup (60ml) vegetable oil
  • 1 teaspoon vanilla extract
  • 1/2 cup (120ml) boiling water
  • 4 oz (115g) dark chocolate (70% cacao), chopped
  • 1 cup (240ml) heavy cream, chilled
  • 2 tablespoons powdered sugar
  • 1/2 teaspoon vanilla extract
  • 4 oz (115g) milk chocolate, chopped
  • 4 oz (115g) white chocolate, chopped
  • Shaved chocolate or cocoa powder for decoration
  • Fresh fruit (optional)

Directions:

  1. Preheat your oven to 350°F (175°C). Grease and line a 9-inch round cake pan with parchment paper.
  2. In a medium bowl, sift together the flour, cocoa powder, baking powder, baking soda, and salt.
  3. In another bowl, beat the eggs and sugar until light and fluffy. Add the buttermilk, vegetable oil, and vanilla extract, mixing until combined.
  4. Slowly add the dry ingredients to the wet mixture, stirring until smooth. Carefully mix in the boiling water (the batter will be thin).
  5. Pour the batter into the prepared pan and bake for 25-30 minutes or until a toothpick comes out clean. Let it cool completely.
  6. For the dark chocolate mousse: Melt the dark chocolate in a double boiler and let it cool slightly. Whip the cream and powdered sugar until soft peaks form, then fold in the melted chocolate.
  7. Repeat the melting and whipping process with the milk chocolate and then the white chocolate.
  8. Once the cake is cool, slice it in half horizontally. Place the bottom layer on a serving plate.
  9. Spread the dark chocolate mousse over the bottom layer, followed by the milk chocolate mousse, and then the white chocolate mousse.
  10. Gently place the top layer of cake on top and press down lightly.
  11. Chill in the refrigerator for at least 4-6 hours or overnight for the best results.
  12. When ready to serve, decorate with shaved chocolate or cocoa powder and fresh fruit if desired. Enjoy it cold!

How to Serve Triple Chocolate Pastel Mousse

Serve this cake cold for the best taste. You can slice it into pieces and add fresh fruits or whipped cream on top for extra flair. It’s perfect for birthdays, holidays, or just a cozy dessert night at home!

How to Store Triple Chocolate Pastel Mousse

To keep your cake fresh, store it in the refrigerator. Cover it with plastic wrap or place it in an airtight container. It can last about 3-4 days in the fridge, but it’s so yummy, it might not last that long!

Tips to Make Triple Chocolate Pastel Mousse

  • Make sure all your ingredients are at room temperature before starting.
  • Don’t skip cooling the chocolate before mixing it into the cream; this helps keep the mousse light and fluffy.
  • For extra flavor, you can add a pinch of sea salt to the chocolate mousse for a nice contrast to the sweetness.

Variation

If you want to mix things up, try adding coffee or espresso powder to enhance the chocolate flavor. You can also switch out the chocolate types for flavored chocolates, like mint or orange.

FAQs

1. Can I use different types of chocolate?
Yes! Feel free to use any type of chocolate you love. Just make sure to adjust the sweetness accordingly.

2. How long does this cake last in the fridge?
The cake can last about 3-4 days in the refrigerator if stored properly.

3. Can I freeze the Triple Chocolate Mousse Cake?
Yes, you can freeze it! Just make sure to wrap it tightly in plastic wrap and then in aluminum foil. It can be frozen for up to a month.

Triple Chocolate Mousse Cake

Triple Chocolate Mousse Cake


Introduction

If you love chocolate, you’re in for a treat! This Triple Chocolate Mousse Cake is a delightful dessert that brings together three rich layers of chocolate mousse. It’s creamy, indulgent, and perfect for any chocolate lover.

Why Make This Recipe

This cake is not just about being delicious; it’s also a feast for the eyes! The combination of dark, milk, and white chocolate creates a stunning look that impresses guests. Plus, it’s a fun recipe to make with family, and once you’ve tried it, you’ll want to make it again and again!

How to Make Triple Chocolate Mousse Cake

Gather your ingredients and get ready to whip up this heavenly cake. You’ll be amazed at how easy it is to create this chocolate masterpiece!

Ingredients:

  • 1/2 cup all-purpose flour
  • 1/4 cup unsweetened cocoa powder
  • 1/2 cup granulated sugar
  • 1/4 cup melted butter
  • 2 eggs
  • 1/2 teaspoon vanilla extract
  • 1 cup heavy cream
  • 1/2 cup dark chocolate, melted
  • 1/4 cup powdered sugar
  • 1 cup heavy cream
  • 1/2 cup milk chocolate, melted
  • 1/4 cup powdered sugar
  • 1 cup heavy cream
  • 1/2 cup white chocolate, melted
  • 1/4 cup powdered sugar
  • Cocoa powder, for dusting
  • Fresh raspberries
  • Edible flowers, for decoration

Directions:

  1. Preheat your oven to 350°F (175°C) and grease a 9-inch springform pan.
  2. In a bowl, mix together the flour, cocoa powder, and granulated sugar.
  3. Add the melted butter, eggs, and vanilla extract, stirring until smooth.
  4. Pour the batter into the prepared pan and bake for 20-25 minutes. Let it cool completely.
  5. For the dark chocolate mousse, whip the cream with powdered sugar until you get stiff peaks. Gently fold in the melted dark chocolate and spread it over the cooled cake base.
  6. Repeat the same process for the milk chocolate mousse and then the white chocolate mousse, chilling each layer before adding the next.
  7. Once the mousse layers are set, dust the top with cocoa powder and decorate with fresh raspberries and edible flowers.

How to Serve Triple Chocolate Mousse Cake

Slice the cake into beautiful pieces and serve it chilled. It pairs well with a cup of coffee or tea. Your family and friends will love every bite!

How to Store Triple Chocolate Mousse Cake

Keep any leftover cake in the refrigerator for up to 3 days. Make sure to cover it with plastic wrap to keep it fresh.

Tips to Make Triple Chocolate Mousse Cake

  • Make sure all your chocolate is melted and slightly cooled before mixing.
  • Whip the cream until it’s stiff, but be careful not to overwhip.
  • Chill each layer for at least 30 minutes to make sure it sets well.

Variation

You can add your favorite fruit on top for extra flavor. Berries or even banana slices go great with chocolate!

FAQs

1. Can I use different types of chocolate?
Yes! You can mix and match your favorite chocolates in this recipe.

2. How long does it take to make this cake?
It takes about 1 hour to prepare and bake, plus some chilling time for the mousse layers.

3. Can I make this cake in advance?
Absolutely! You can make it a day ahead, just store it in the refrigerator until you’re ready to serve.


Get ready to dive into a world of chocolate bliss! Enjoy making your Triple Chocolate Mousse Cake!

Exit mobile version